Scriptum
Scriptum (scriptum.marswars.org) is the team's robot IDE in your browser. You write Java, click Start, and a simulated robot runs your code while you drive it and watch its data. There is nothing to install. Every training lesson after the tools session is done in Scriptum, and its Verify button checks your work.
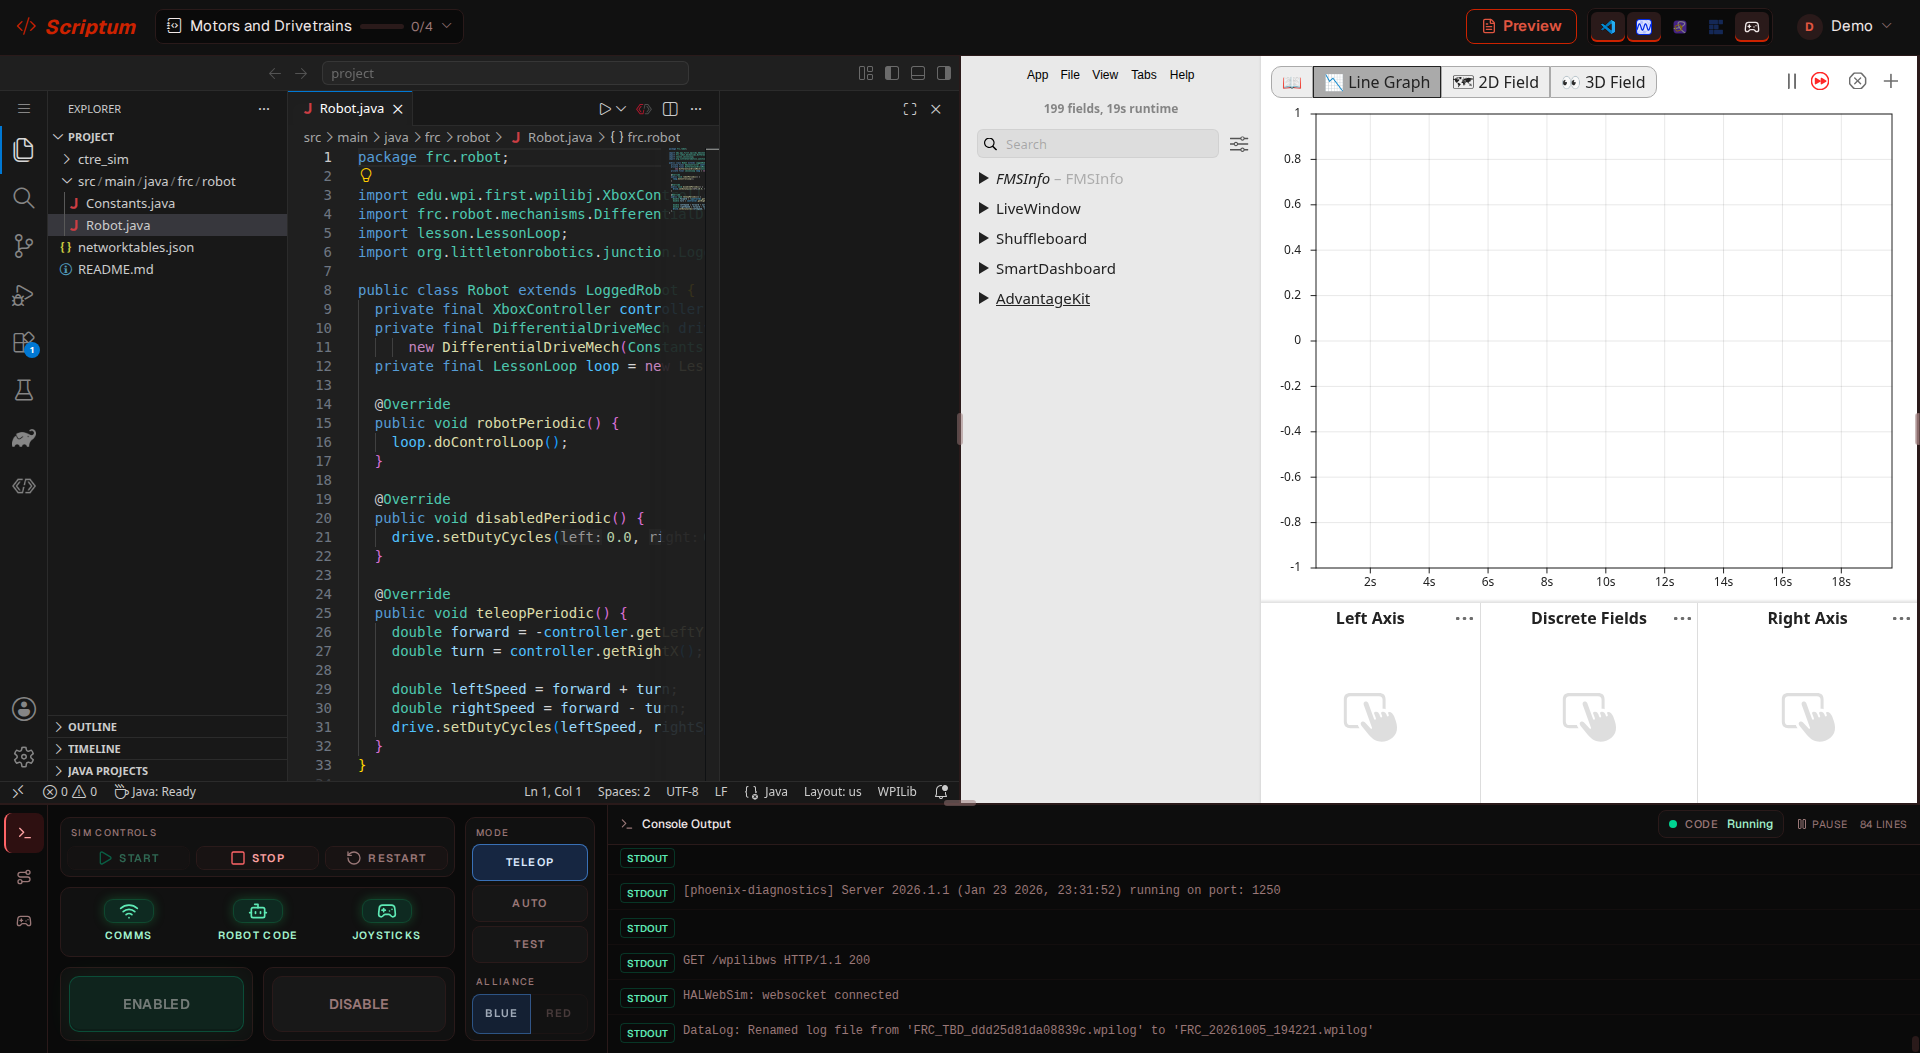
The training sessions tell you which Scriptum lesson to open. Each lesson has a README with the steps, a session plan for the 3 hours, and a short Java you will learn section that explains each new idea right before you use it.
Sign in and start your workspace
- Go to scriptum.marswars.org and sign in with your team account (the same one you use for the other team apps).
- The first time, Scriptum asks if you are ready to start. Click Start my workspace. It takes about a minute to get your own private computer ready.
- After a while with no activity your workspace shuts itself down to save resources. Open the page again and start it again. Your work is saved.
The welcome screen
When your workspace opens you land on the welcome screen.
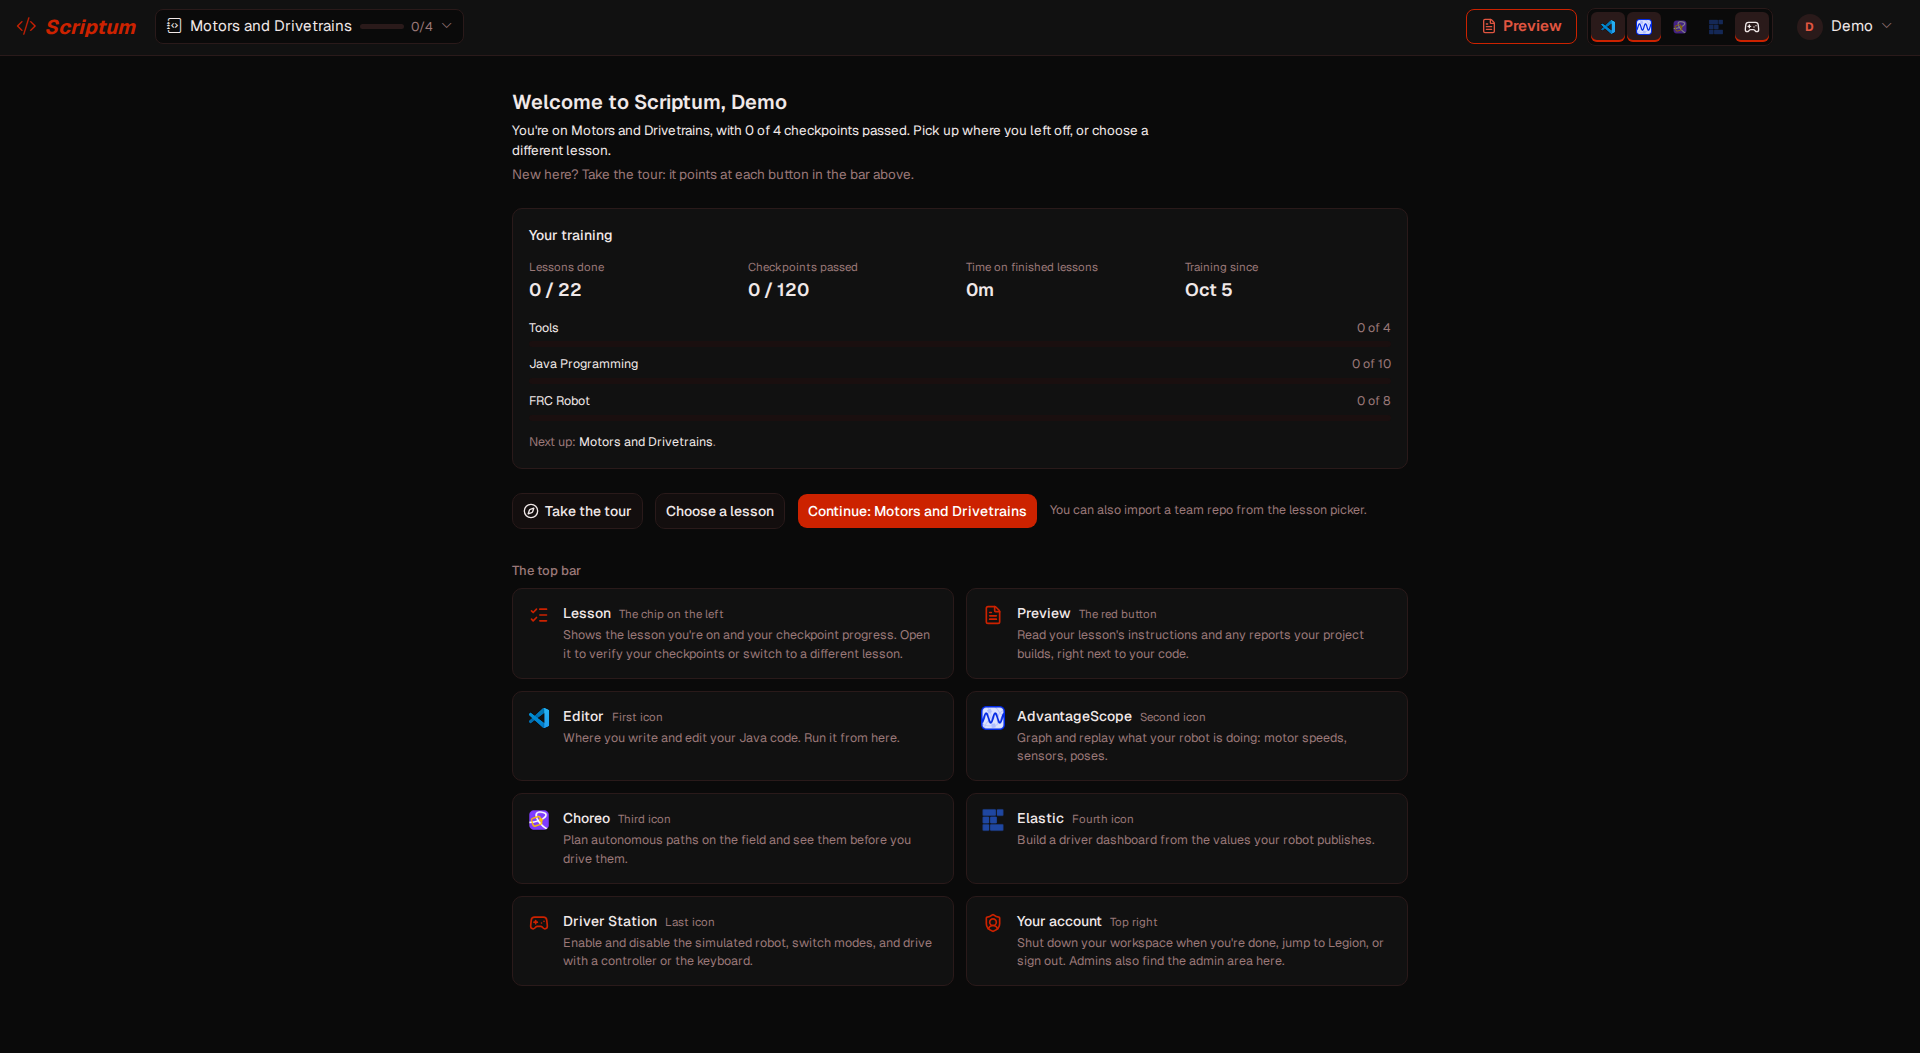
- Your training shows how many lessons you have finished and how many checkpoints you have passed, by track.
- Take the tour walks you through each button in the top bar.
- Choose a lesson opens the lesson list. Once you have started a lesson, a Continue button takes you straight back to it.
Load a lesson
Click Choose a lesson (or the lesson chip in the top bar, then Switch project…). The lessons are grouped into tracks (Tools, Java Programming, FRC Robot) and listed in order.
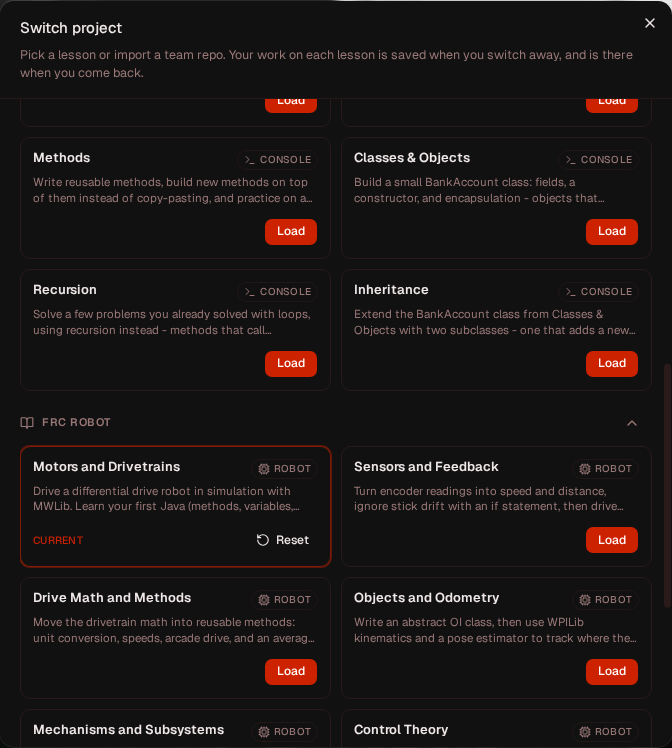
- Click Load on the lesson your session uses. Scriptum asks you to confirm, then copies the lesson into your workspace. When it says Project ready, click Done.
- Your work is saved for each lesson. Switching to a different lesson does not lose it. When you come back, the lesson shows Resume, and the lesson you are in shows CURRENT.
- Reset throws away your saved work for that lesson and starts it over. It cannot be undone, so only use it when you want a fresh start. Checkpoints you already passed stay passed.
- Some lessons stay locked until you finish the one before it.
The screen
Along the top bar, from left to right:
| Button | What it does |
|---|---|
Lesson chip (like Motors and Drivetrains 0/4) | Shows your progress. Click it for Checkpoints and Switch project…. |
| Preview (the red button) | Shows the lesson's README and any reports next to your code. |
| Editor, AdvantageScope, Choreo, Elastic icons | Turn each tool on or off. You can show several at once. |
| Driver Station icon (last one) | Shows or hides the Driver Station at the bottom. |
| Account menu | Shut down your workspace, or sign out. |
Drag the dividers to resize panes. If a pane says Not enough space, please change the screen layout, turn another tool off.
Many lessons hide files you do not need so you can focus on the ones you write. That is normal.
Read the lesson
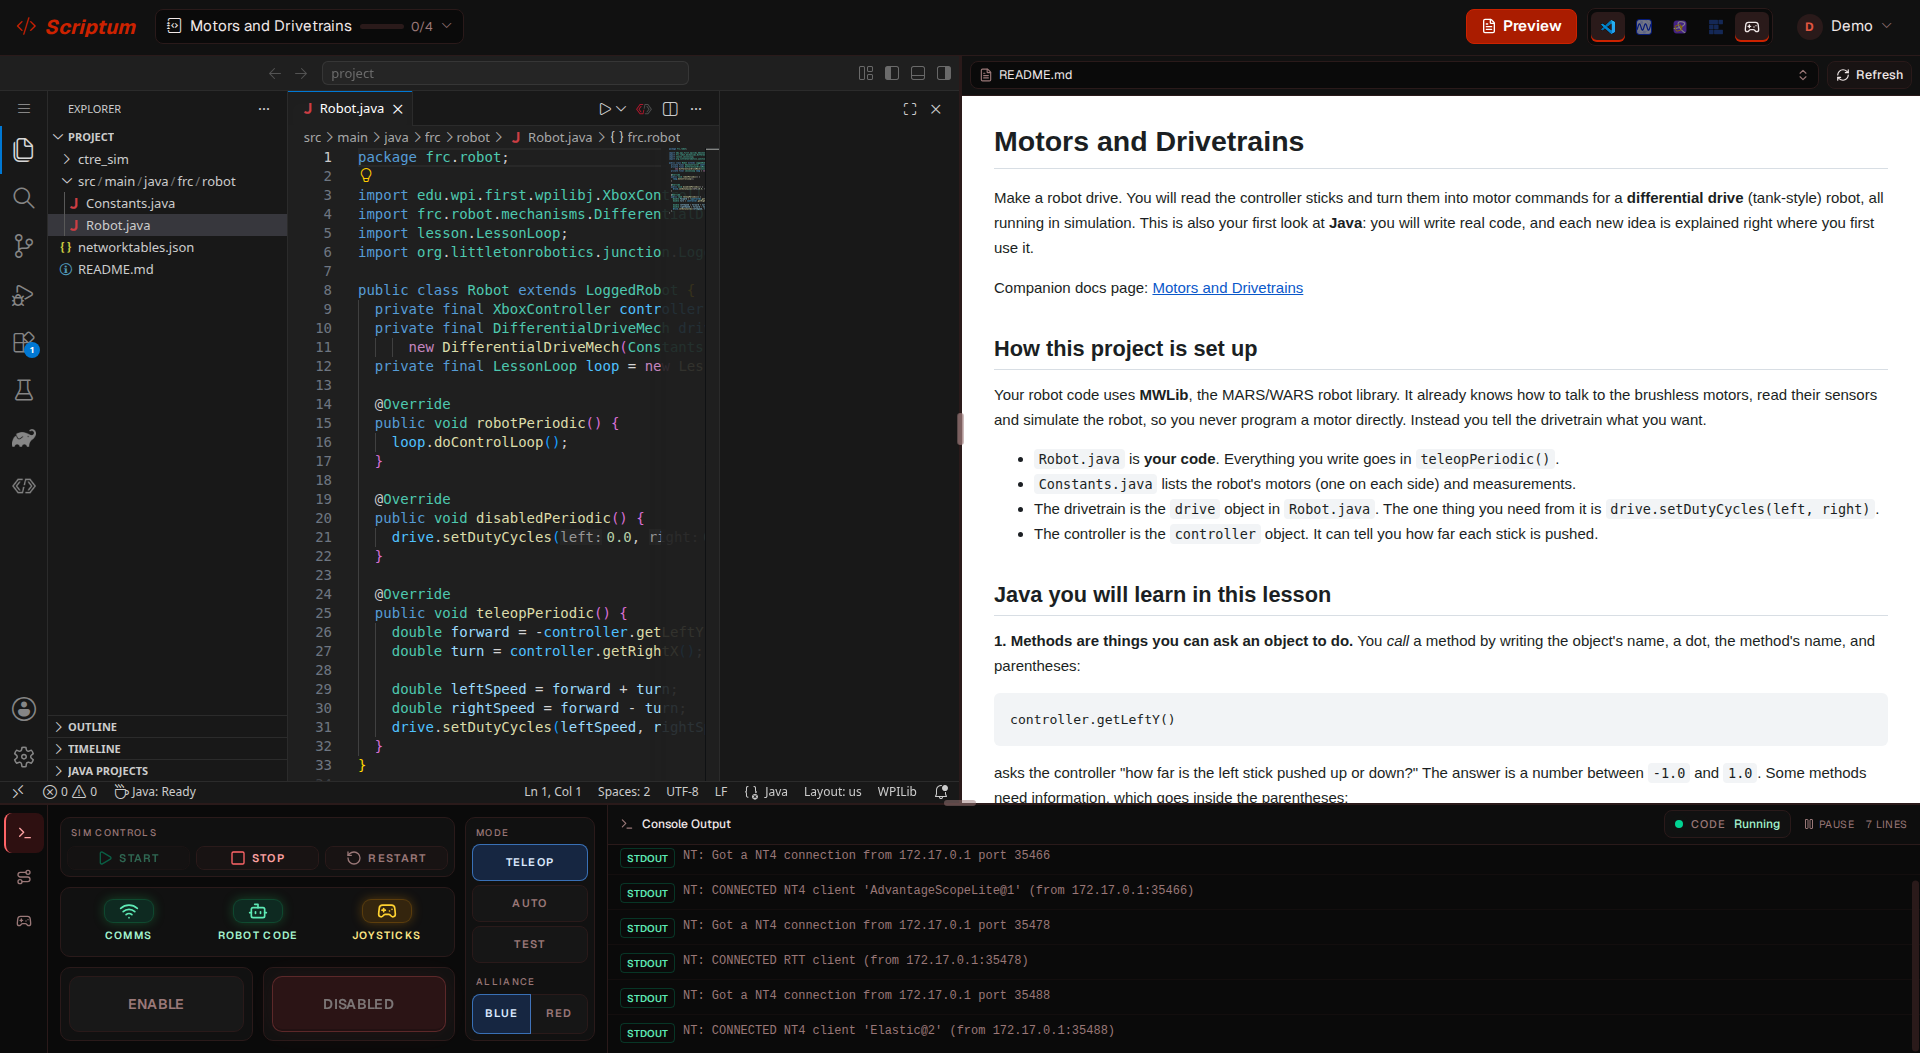
Open the README in the Preview pane to read it right next to your code. Click Refresh if you edit it.
Run your robot
The WPILib extension in the editor has its own simulate button. Do not use it here. Click Start in the Driver Station at the bottom of the page. Only that sets up the simulation the way Scriptum expects.
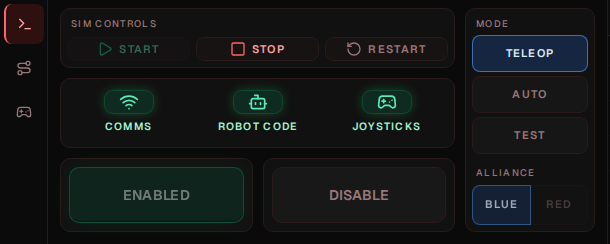
- Click Start. The first start builds your project, so give it a minute.
- Wait for Comms and Robot Code to turn green.
- Open the Controls tab (the controller icon on the left of the Driver Station) and choose Keyboard, or plug in a gamepad. Joysticks turns green when an input is selected. Enable will not work until it is.
- Pick Teleop, Auto or Test, then click Enable.
- Click Stop when you are done, or Restart to stop and re-run with the changes you just made.
Build errors and your robot's printed output show up in the Console tab. If the build fails, read the first error: line. It names the file,
the line number and what is wrong.
Drive the robot

Click the Driver Station once so it has focus, then drive. The Controls tab shows KEYS ACTIVE while keys are being read, and the Live state picture shows what the robot sees. View mapping lists every key.
| Keyboard | Gamepad |
|---|---|
| W / A / S / D | Left stick (up / left / down / right) |
| Arrow keys | Right stick |
| Q / O | Left trigger / Right trigger |
| E / U | Left bumper / Right bumper |
| K / L / J / I | A / B / X / Y buttons |
| R / Y | Back / Start |
| F / H | Left / Right stick click |
| Z / X / C / V | D-pad up / down / left / right |
When your code publishes an autonomous chooser, an Auto tab appears next to Console and Controls. Pick the routine there, set the mode to Auto, and Enable. The Alliance buttons switch between Blue and Red.
Watch your robot
- AdvantageScope is open by default. Every value your code logs shows up in the list on the left. See AdvantageScope.
- Elastic Dashboard is another way to view live values. Its layout is saved in your project. See Elastic.
- Choreo is the path editor for autonomous routines. See Choreo.
Check your work with Verify
Click the lesson chip, then Checkpoints. Click Verify on one, or Verify all.
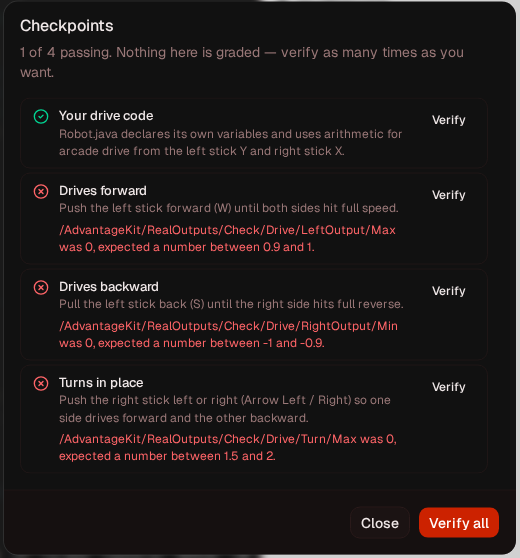
A green check means it passed. A red mark tells you what Scriptum saw, so you know what to fix. Nothing here is graded, so verify as many times as you like.
- Some checkpoints read your code, for example "
Robot.javadeclares its own variables". - Some watch what your robot did, for example "the left side reached full speed". Their message names a value and says what number it expected. For these, Start the robot, do the action, then Verify. Verify looks at your latest run, so after you change your code, Restart the robot and run it again before you verify.
- Later lessons unlock once you pass all the required checkpoints in the one before.
If something goes wrong
| Problem | Try this |
|---|---|
| The build fails | Read the first error: line in the Console. Fix that one first. Missing ;, a typo, or a missing import are the usual causes. |
| Comms or Robot Code never turns green | Click Stop, then Start again. If the Console shows a build error, fix it first. |
| Enable is greyed out | Open the Controls tab and choose Keyboard or a gamepad so Joysticks turns green. |
| The robot does not move | Click the Driver Station so it has focus, check the mode, and make sure you clicked Enable. |
| A "watch the robot" checkpoint fails | Restart the robot, repeat the action, and Verify again. Verify checks your latest run. |
| A pane says "Not enough space" | Turn off another tool in the top bar, or drag the dividers. |
| You broke the project | Use Reset on the lesson in the lesson list to start it over. Your passed checkpoints stay passed. |
| The workspace stopped | Open the page again and click Start my workspace. |
Still stuck? Ask a mentor.